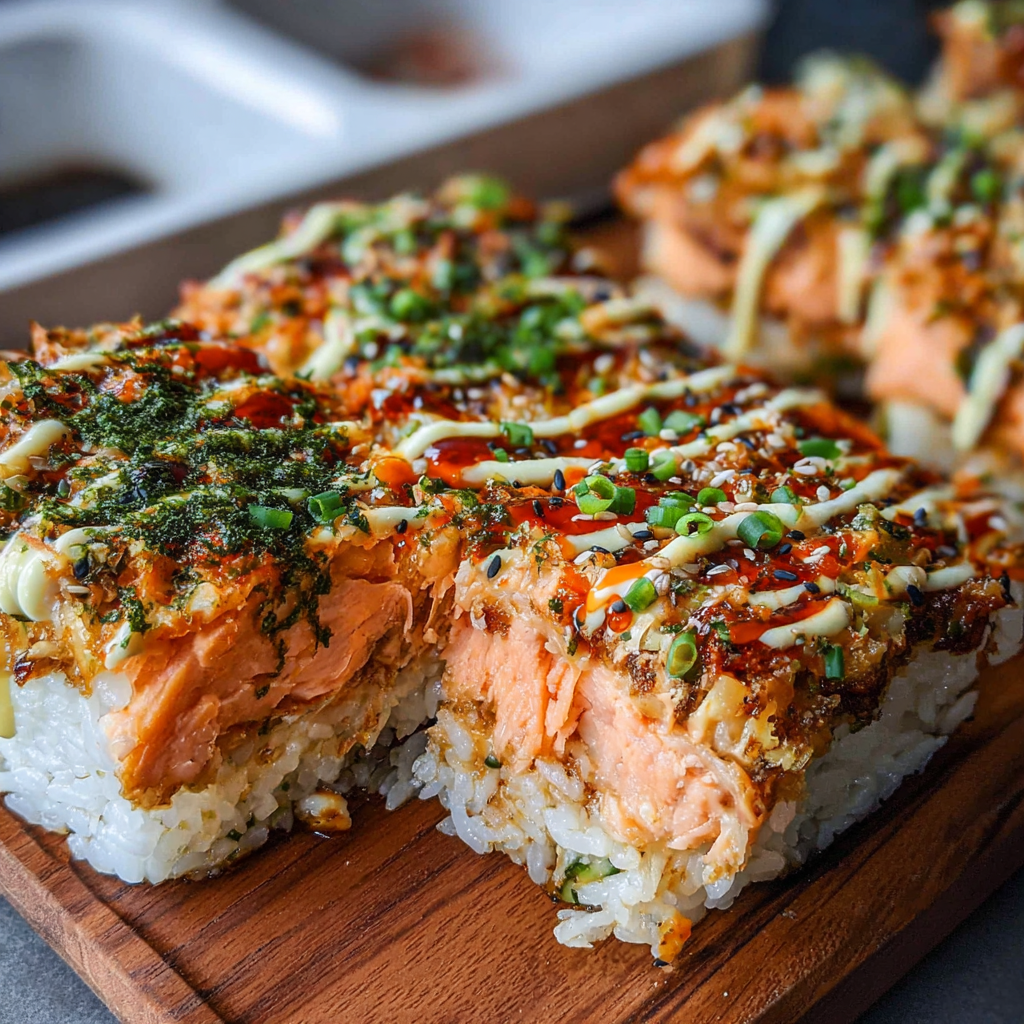
The Salmon Sushi Bake Recipe is a modern twist on traditional sushi that delivers all the flavors you love—without the rolling. This baked sushi casserole layers seasoned rice, creamy salmon, and savory toppings into one warm, comforting dish. Popular on social media for its simplicity and crowd-pleasing taste, sushi bake has become a go-to option for anyone who loves sushi but wants an easier way to enjoy it at home. From spicy salmon sushi bake to lighter versions like healthy sushi bake, this dish is endlessly customizable and perfect for sharing with family and friends.
Why Make Salmon Sushi Bake
This recipe is loved for many reasons:
- No rolling or special sushi skills required
- Great for feeding a crowd
- Easier than making salmon sushi rolls
- Customizable with different proteins or veggies
- Can be made healthier or indulgent
If you enjoy smoked salmon sushi, tuna sushi bake, or even plant-based options like vegan sushi bake, this recipe gives you a flexible base to work with.
How to Make Salmon Sushi Bake
A sushi bake starts with a flavorful baked sushi rice recipe, topped with creamy salmon and finished in the oven until warm and slightly crispy on top. The dish is served by scooping onto seaweed sheets and eating it like deconstructed sushi. This method turns classic sushi flavors into an easy sushi casserole that anyone can make.
Ingredients
Sushi Rice
- 2 cups sushi rice
- 2½ cups water
- 3 tablespoons rice vinegar
- 1 tablespoon sugar
- 1 teaspoon salt
Salmon Layer
- 12 oz fresh or cooked salmon, flaked
- ¼ cup mayonnaise
- 2 tablespoons sriracha (adjust to taste)
- 1 teaspoon soy sauce
- 1 teaspoon sesame oil
Toppings
- Furikake seasoning
- Green onions, sliced
- Sesame seeds
- Optional cream cheese
For variations:
- Use crab for sushi bake salmon and crab
- Substitute tuna for tuna sushi bake
- Swap salmon with smoked salmon for a richer flavor
Directions
- Rinse sushi rice until water runs clear. Cook according to package instructions.
- While rice is hot, mix rice vinegar, sugar, and salt, then fold into rice gently.
- Preheat oven to 375°F (190°C). Lightly grease a baking dish.
- Spread sushi rice evenly into the dish and sprinkle with furikake.
- In a bowl, mix salmon, mayonnaise, sriracha, soy sauce, and sesame oil.
- Spread salmon mixture evenly over the rice layer.
- Add optional cream cheese or extra seasoning on top.
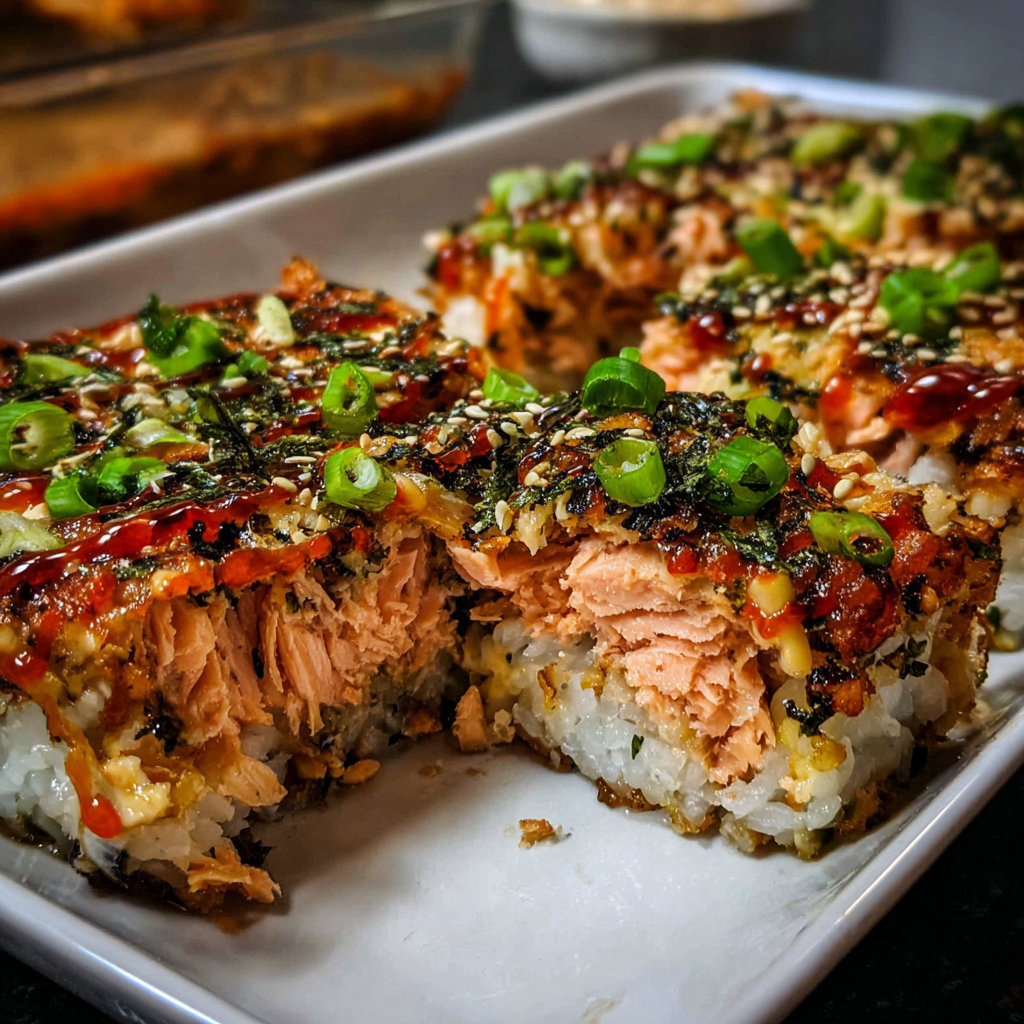
- Bake uncovered for 15–20 minutes until warmed through and lightly golden.
- Garnish with green onions and sesame seeds before serving.
This method makes a sushi bake recipe easy enough for beginners while still delivering authentic flavor.
How to Serve
Serve your salmon sushi bake recipe warm and fresh:
- Scoop onto nori sheets
- Add cucumber, avocado, or pickled ginger
- Drizzle with extra spicy mayo or eel sauce
This dish is best enjoyed family-style and makes a great centerpiece for casual gatherings or sushi nights at home.
Tips for a Perfect Salmon Sushi Bake
- Use short-grain sushi rice for best texture
- Let rice cool slightly before assembling
- Adjust spice level to preference
- For a healthy sushi bake, use Greek yogurt instead of mayo
- Avoid overbaking to keep salmon tender
These tips help you customize the dish without losing its signature flavor.
FAQs
Can I make sushi bake ahead of time?
Yes, assemble it ahead and bake just before serving.
Is sushi bake eaten hot or cold?
Traditionally served warm, unlike regular sushi.
Can I make this vegetarian?
Absolutely—use tofu, mushrooms, or vegetables for a vegan sushi bake.
What’s the difference between sushi bake and sushi rolls?
Sushi bake is layered and scooped, while salmon sushi rolls are individually rolled.
Final Thoughts
This Salmon Sushi Bake Recipe is the perfect balance of comfort food and classic sushi flavor. Easy, shareable, and endlessly adaptable, it’s no surprise this dish has become a viral favorite. Whether you’re craving a spicy salmon sushi bake, exploring healthy sushi bake options, or just want a fun alternative to traditional sushi, this recipe delivers every time. Once you try it, sushi bake will become a regular part of your meal rotation.
Salmon Sushi Bake Recipe
Ingredients
Method
- Rinse sushi rice until water runs clear. Cook rice with water according to package instructions.
- While rice is warm, gently fold in rice vinegar, sugar, and salt.
- Preheat oven to 375°F (190°C). Lightly grease a baking dish.
- Spread sushi rice evenly into the dish and sprinkle with furikake seasoning.
- In a bowl, mix flaked salmon, mayonnaise, sriracha, soy sauce, and sesame oil until combined.
- Spread salmon mixture evenly over the rice layer.
- Add optional cream cheese or extra seasoning on top if desired.
- Bake uncovered for 15–20 minutes until heated through and lightly golden.
- Garnish with green onions and sesame seeds before serving.